This article was written on Pragma Engine version 0.0.94.
Integrating Custom Services with Provided Services #
In the fourth article of this series, we’ll walk through how to integrate advanced custom services into the provided Pragma Engine workflows. Possible integrations include having your custom services called by other Pragma Engine provided services, or calling preexisting provided services within your own custom services.
Utilize plugins for custom service integration #
To accomplish custom service integration within the Pragma Engine workflow, you can utilize a set of configurable plugins that can be customized and overridden with your service’s required functionality.
Plugins, in short, are classes that can be enabled in your 5-ext folder to further configure preexisting Pragma Engine services. Once enabled and integrated, they provide a plethora of opportunities to inject custom code and logic into existing Pragma Engine workflows. You can also use custom RPCs in a plugin for service-to-service communication–this requires already defined custom RPCs in protos that use the SERVICE session with endpoint logic built in Kotlin.
To learn more about plugin use cases, you can see how plugins are used to create unique instanced items in our Instanced Items series.
For the next section, we’re going to go over how to integrate a custom service into the Match Lifecycle service by using a Match End Plugin, which is a very common use case for integrating custom services with provided services.
Create a custom plugin for calling services #
Go to your custom service directory and create a new file for your custom plugin. In this file, copy over the relevant default plugin from 2-pragma/game-common/src/main/kotlin/pragma/, which for this tutorial is the MatchEndPlugin from pragma/matchlifecycle/MatchEndPlugin.kt.
A full list of default plugins is available in our API reference documentation for game-common and social-common plugins.
Once you’ve copied the plugin, create a new Kotlin file for the plugin in your custom service’s directory. For this tutorial, the file is going to be called MyCustomTechBlogMatchEndPlugin.kt and created in the 5-ext/ext/src/main/kotlin/customproject/matchlifecycle/ directory.
You can see the plugin in action below:
package myproject.matchlifecycle

class MyCustomTechBlogMatchEndPlugin(
    val service: Service,
    val contentDataNodeService: ContentDataNodeService
) : MatchEndPlugin {

    override suspend fun getMatchEndJobs(
        playerId: UUID,
        matchEnd: MatchEnd,
    ): List<MatchEndDependentJob> {
        return listOf(
            InventoryMatchEndDependentJob(playerId, matchEnd, service),
            ProgressionMatchEndDependentJob(playerId, matchEnd, service)
        )
    }
}
Then, you can decide to use dependent jobs, service-to-service RPCs, or a combination of both to integrate your custom service within a provided service’s plugin.
Dependent Jobs #
Dependent jobs are tasks that depend on other information to run, and the dependent job pattern, commonly used in the Match End Plugin, Login Data Plugin, and custom service plugins, enables concurrent processing and interactions between services when there are dependencies between processed data and other tasks. In other words, it’s a class that returns true whenever all dependencies for a specific dependent job are met.
It’s often used when services depend on one another’s processed data to run. In the Match Lifecycle service, for example, the MatchEnd payload has dependent jobs that require information from other services like inventory to deliver rewards or item-grants to players. When implemented for custom services, it’s used to pull specific data for a custom service. You can read more about it in our Concurrency docs page.
When integrating a custom service via a dependent job pattern, you’ll need to add a new dependent job line to the appropriate listOf() function. In the case below for our Match End Plugin, the listof() for MatchEndDependentJob has a custom dependent job called MyCustomTechBlogMatchEndDependentJob that will need to be defined in a separate class.
override suspend fun getMatchEndJobs(
    playerId: UUID,
    matchEnd: MatchEnd,
): List<MatchEndDependentJob> {
    return listOf(
        InventoryMatchEndDependentJob(playerId, matchEnd, service),
        ProgressionMatchEndDependentJob(playerId, matchEnd, service),
        MyCustomTechBlogMatchEndDependentJob(playerId, matchEnd, service)
    )
}
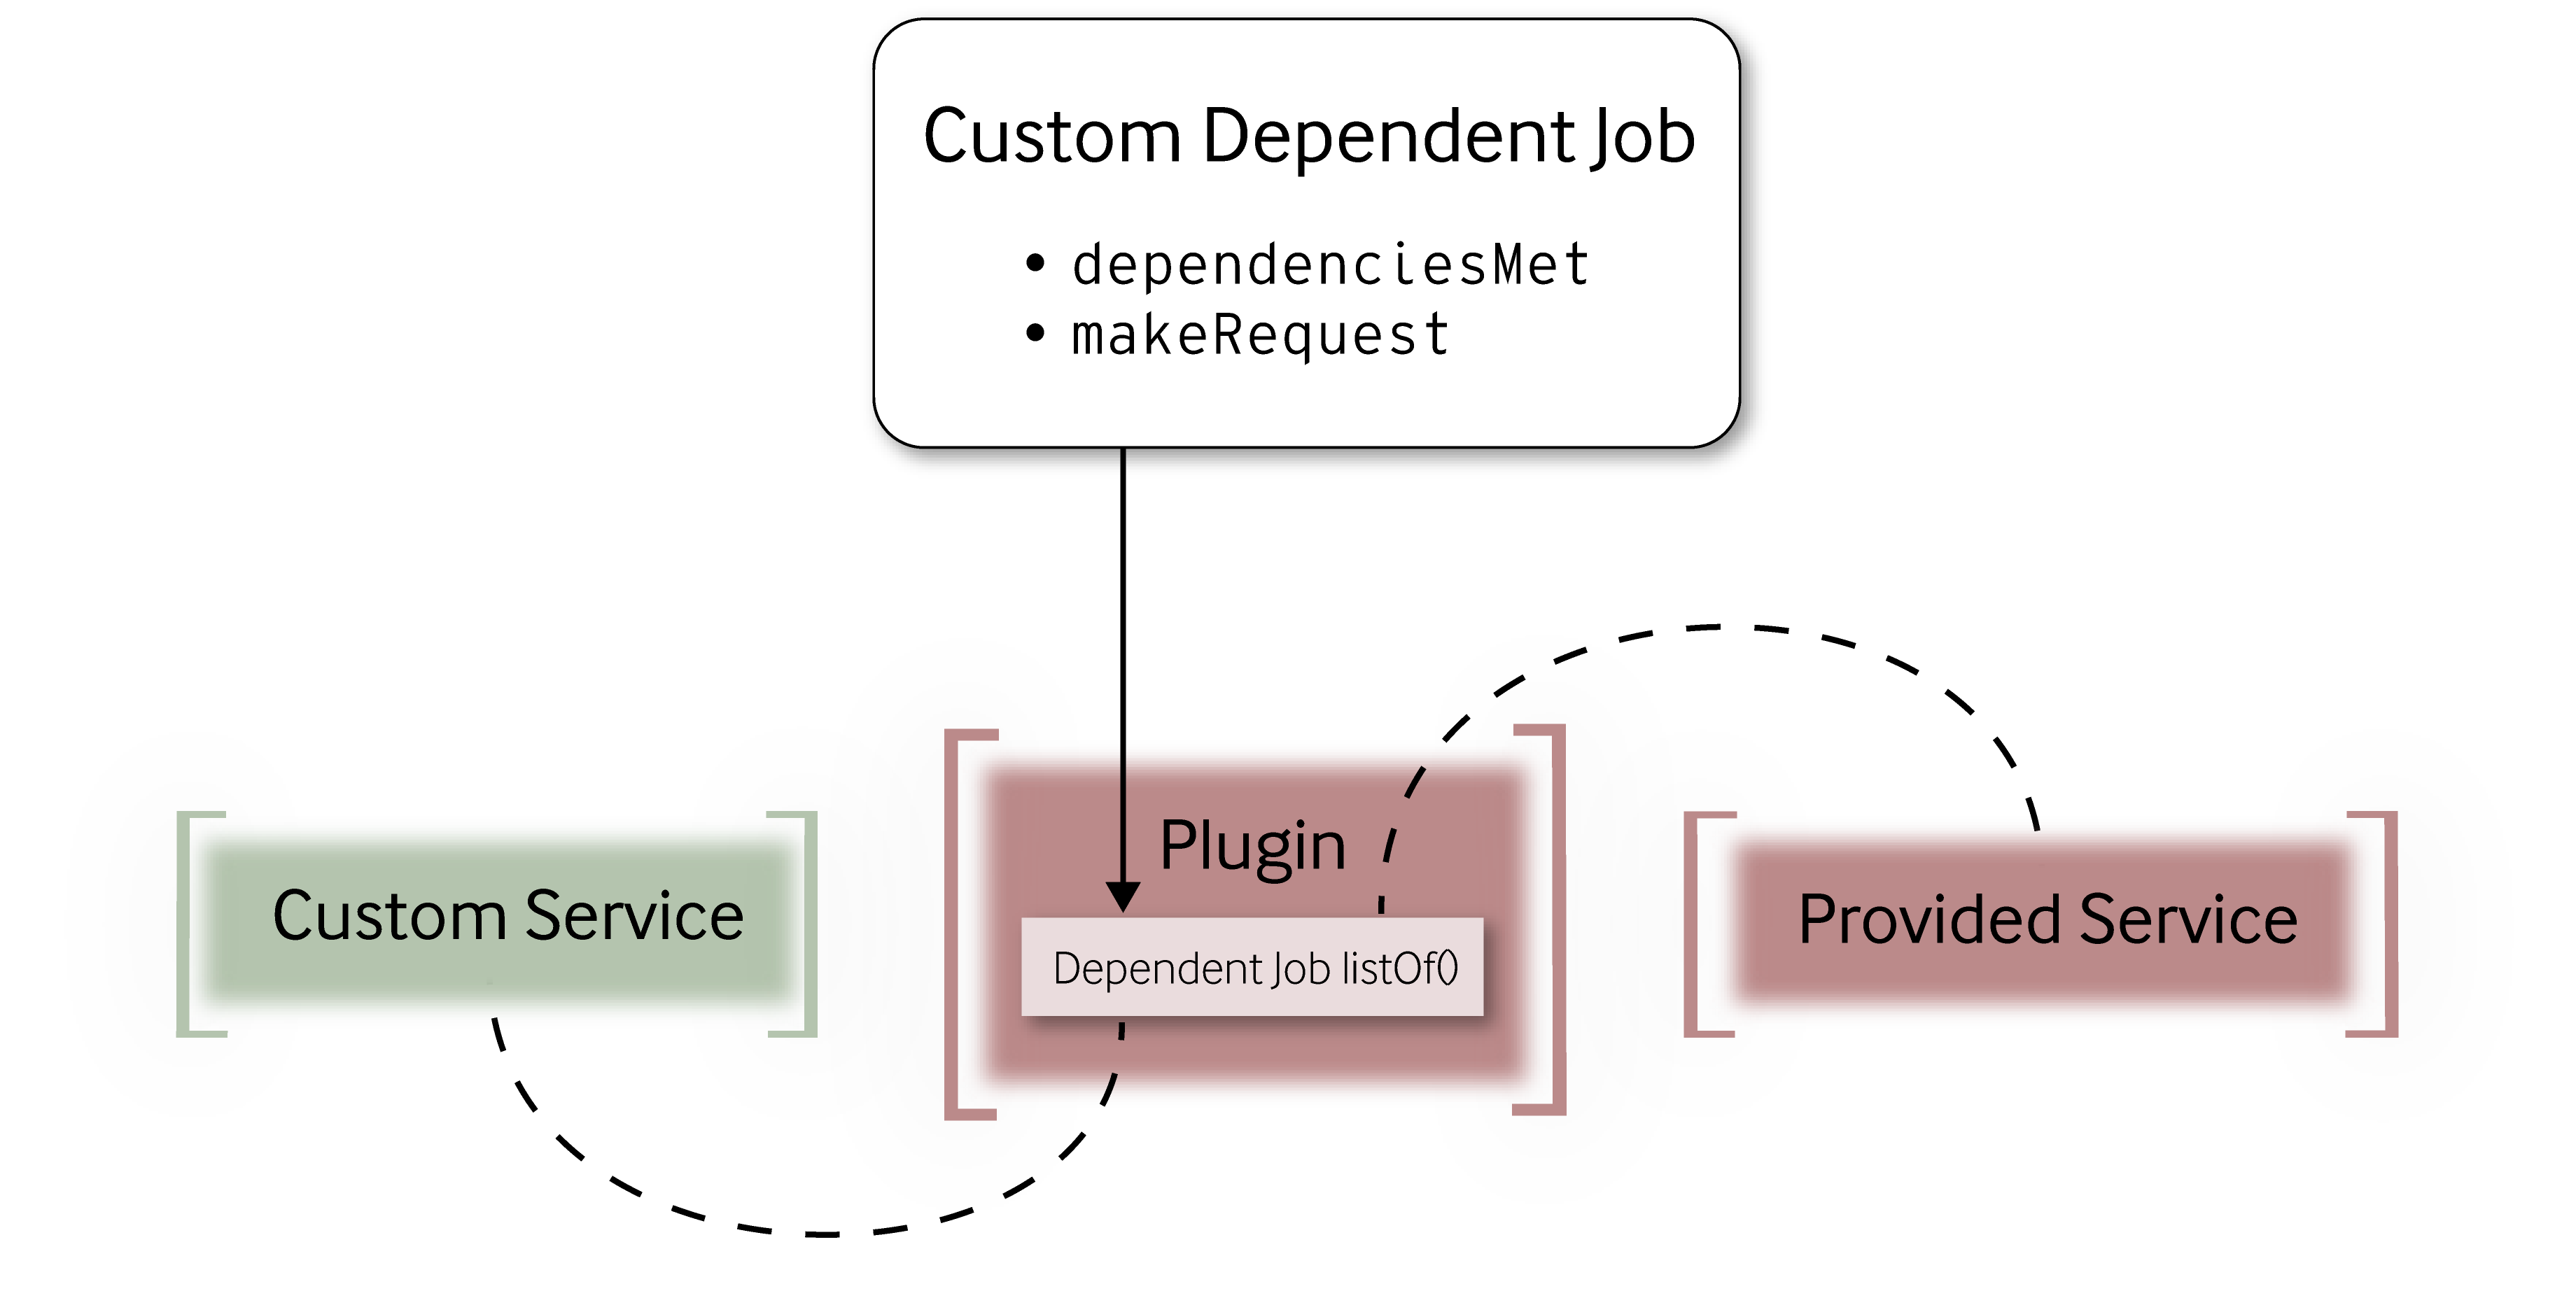
A dependent job, whether that job is a collection of RPCs or dependent task logic, is composed of two main pieces: dependenciesMet and makeRequest.
dependenciesMetis an RPC called before running the dependent job. It determines if the prior RPC call the job depends on is complete.makeRequestis the core of the dependent job’s tasks, and is called when all required dependencies have been met. This function performs all the job’s logic, sends off requests to other services, and awaits the service’s response.
For example, a custom implementation of the Match End Plugin can trigger multiple interdependent RPC service calls, but it’s the MatchEndDependentJob() class that actually handles the interactions between the calls. You can see a CustomTechBlogDependentJob() class below handles these interactions by utilizing a specific, custom RPC called MyCustomMatchEndActionServiceV1Request.
package myproject.matchlifecycle

class CustomTechBlogMatchEndDependentJob(
    playerId: UUID,
    val matchEnd: MatchEnd,
    val service: Service,
) : MatchEndDependentJob() {
    override fun dependenciesMet(context: DependentJobContext): Boolean {
        return true
    }

    override suspend fun makeRequest(
        context: DependentJobContext,
        mutable:
            ThreadsafeMutable<GameDataRpc.MatchProcessedV3Notification.Builder>
    ) {
        val result =
            service.requestRpc(
                MyCustomRpc.MyCustomMatchEndActionServiceV1Request.newBuilder()
                    .setPlayerId(playerId.toFixed128())
                    .setMatchEnd(matchEnd.toProtoV4())
                    .build(),
                MyCustomRpc.MyCustomMatchEndActionServiceV1Response::class
            )
                ...
    }
}
If you want to use a response from your custom service in future dependent jobs, make sure to set the response on the context. You can see below how we’ve created a when statement to enable repeated use of the service’s response.
val result = service.requestRpc(
    MyCustomRpc.MyCustomMatchEndActionServiceV1Request.newBuilder()
        .setPlayerId(playerId.toFixed128())
        .setMatchEnd(matchEnd.toProtoV4())
        .build(),
    MyCustomRpc.MyCustomMatchEndActionServiceV1Response::class
)

when (result) {
    is PragmaResultResponse -> {
        val response = result.response
        mutable.write {
            ...
            context.setResult(result.response)
        }
    }
    is PragmaResultError -> {
        ...
    }
}
Service-to-Service RPCs #
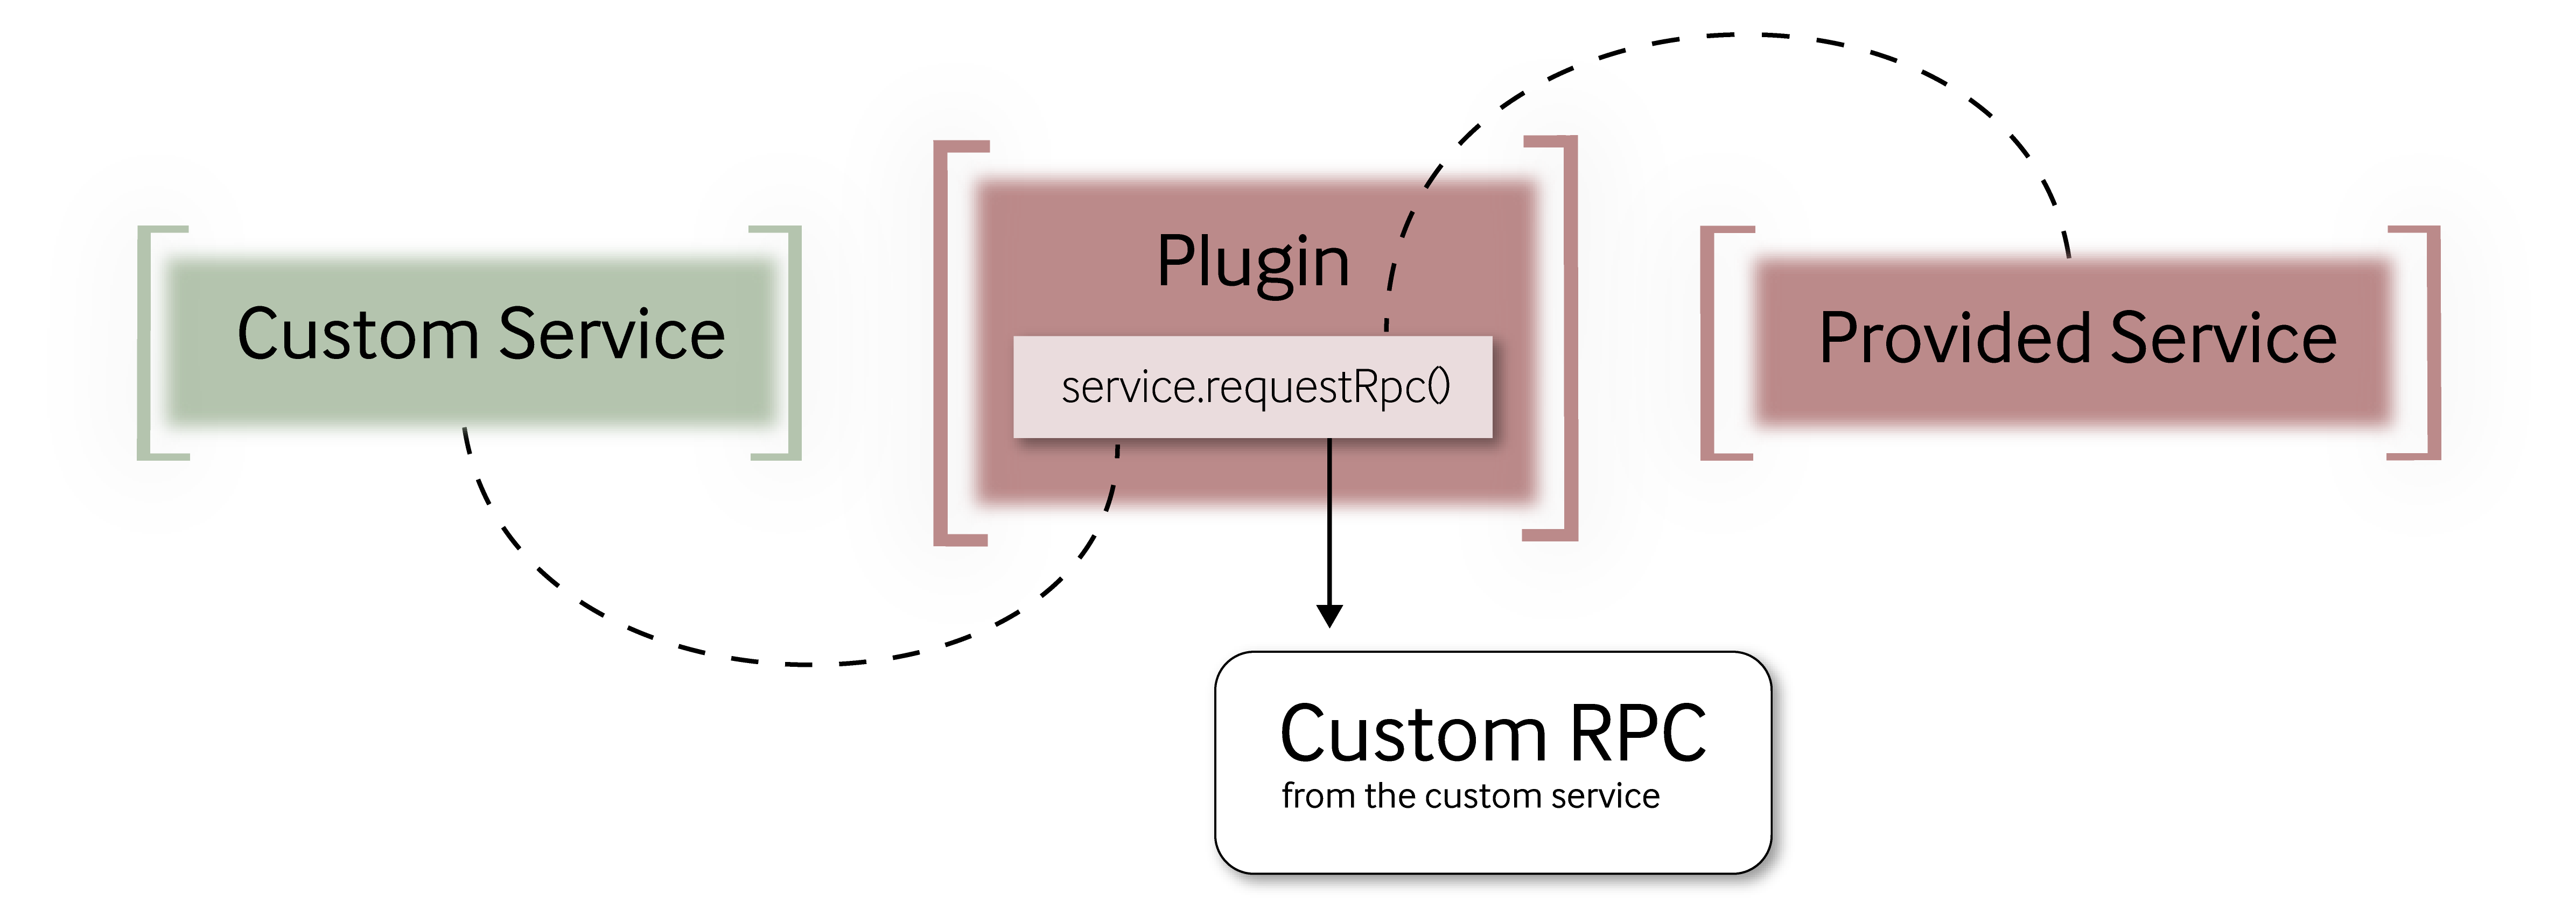
You can also call your own custom service from other services in Pragma Engine, with or without the dependent job workflow. Remember that you’ll need to create the RPC endpoints used to communicate between your service and other services in protos with the service session.
When calling RPCs in a plugin, make sure you use the SERVICE session, defined using a val, to enable communication with other services. The RPC endpoint should look something like this using our custom Match End Plugin example:
 val result = service.requestRpc(
    MyCustomRpc.MyCustomActionServiceV1Request.newBuilder()
        .setCustomId(customId)
        .setCustomData(customData)
        .build(),
    MyCustomRpc.MyCustomActionServiceV1Response::class
)

when (result) {
    is PragmaResultResponse -> {
        logger.info("MyCustomAction returned ${result.response} successfully.")
    }
    is PragmaResultError -> {
        logger.error("Something went wrong with MyCustomAction.")
    }
}
Configuring the plugin #
Once you’ve finished the plugin’s logic, override the default plugin behavior by specifying your plugin in the YAML config file. Don’t forget to use the class’s fully qualified name to completely register the service.
The following config will override the Match End Plugin above with our newer version that contains the MyCustomTechBlog service.
game:
  pluginConfigs:
    MatchLifecycleService.matchEndPlugin:
      class: "mycustom.matchlifecycle.MyCustomTechBlogMatchEndPlugin"
And that’s how you design, create, and integrate your own custom service with Pragma Engine!
For more information, check out the rest of the articles in this series:
Part I: Introduction to Custom Services
Part II: Creating a Custom Service
Part III: Using Database Storage for Custom Services
Part IV: Integrating Custom Services with Provided Services (this article)


